


Showing posts with label Halloween. Show all posts
Showing posts with label Halloween. Show all posts
Wednesday, October 31, 2012
Free Halloween Printables

{Fall Pumpkin} Treat Holders
HAPPY HALLOWEEN!!
These treat holders are so easy to make and can be easily adapted to any season or event.
Chevron patterns (like I used for the paper) seem to be everywhere in decorating nowadays and I didn't care for it much in the beginning….that surprises me because I l.o.v.e. ric rack, squiggles and wavy lines…..but this pattern has grown on me.
The pattern paper is one I found in the My Memories Suite shop and printed out an 8 1/2 x 11 sheet of it. I got 3 treat holders out of 1 sheet.

Tuesday, October 30, 2012
{Halloween} Treat Bag Toppers with Free Printable

Monday, October 29, 2012

Sunday, October 28, 2012
{Shining Jack-o-Lantern) ~ Paper Plate Craft for Sunday School
Happy Sunday!
With this being the Sunday before Halloween we created these paper plate Shining Jack-o-Lanterns to remind us that God shines His light through us. It was a perfect opportunity to explain to the kids that Halloween is about fun times and use it as a teaching moment.
To give the jack-o-lantern the 3D effect glue or staple each plate backwards (to give sort of a bubble or open area between the plates).
Every year my students love making these Shining Jack-o-lanters. So Fun!

Saturday, October 27, 2012
{Mini Halloween Goodie Bags} ~ Pockets Made from Envelopes

Monday, October 22, 2012
Tootsie Pop Broom Stick {Halloween Treats}
I love treat holders and especially when I can make them look extra cute.
These little witch's brooms have a hidden treat under the bristles -- a tootsie pop. So fun!
I first saw this idea on a YouTube video of one of my favorite crafters and was inspired to create these for myself. She used a brown coffee filter to create a "broom" but I only had white coffee filters -- I used brown glimmer mist to change my white filters into brown ones. This color is a little darker than what I like -- but I used what I had.

Pin It
Wednesday, October 17, 2012
{Painted Burlap} Pumpkins Tutorial
Burlap is so fun to create projects with. It's natural rustic look and feel makes fall decorating so pleasing. I've seen some of these burlap pumpkins floating around different websites I visit and was inspired to create some for my fall decorating.
With just a few supplies I created these fabulous fall pumpkins.

Tuesday, October 16, 2012
{Spookalicous Halloween Mix} ~ It's Frightfully Delicious!

Thursday, September 27, 2012
BOO Banner Tutorial!
When I created my Coffee Filter wreath here awhile back I left it plain and chose not to add a bunch of embellishments because I knew I wanted to cutesy it up for the seasons and attach seasonal decor just like this "BOO Banner" I created for Halloween. I love how it turned out and it was fairly easy to create.

Monday, September 24, 2012
Pick of the Patch ~ Here's 30 Pumpkin Ideas to Share!
♥ To me pumpkins are the essential Fall decor. Big, round, tall, skinny, fat, doesn't matter -- if it's a pumpkin that means Fall to me. Stick them in a wagon, sit them on a porch, hang them off of a ladder, decorate them with eyes, glue or glitter, carve them with a knife, eat them, use them in a pie or loaf of bread, pancakes, muffins or casserole….they are just the essential Fall item.
♥ I'm happy to share these pumpkin ideas with you for some added inspiration and Fall decor.

Wednesday, October 26, 2011
A little Halloween Blast from the Past with CJToo!!
Halloween has to be one of my FAVORITE holidays to craft for…..here are some of my most popular video's from YouTube thanks to YOU!
Visit my YouTube channel for more Halloween videos by me….:)
Tracy
Pin It
Thursday, October 20, 2011
Guest Blogger {Staying Crafty}
I'm super excited to have my friend Amber here today from Staying Crafty to share some wonderful decorations. Amber is so super talented and I just love her style! Thanks for being here today Amber!!!
xxxxxxxxxxxxxxxx

Hello everyone! This is Amber from Staying Crafty and I'm so excited to be sharing on Tracy's blog today.
Today I've decided to share my Halloween decoration table with you. As well as a sort of product review on a foam haunted house kit by Creatology that can be purchased at Michaels.
I display holiday decorations on my dining room table. You can see it when you walk into my house and it is easy to display things here. This year I purchased 2 sparkly candelabras from the Target $1 spot that are at the back of the table (and barely show in the photo.) I have a cute cat decoration. The pumpkin decorations are candle holders made to look like paper bags decorated as pumpkins. They are really fun lit up at night and very easy to store.
I embellished 3 wine bottles to fit the Halloween theme. Here is a close up shot of what they look like.

The main focus in the foam haunted house! I purchased it at Michaels recently. The brand is Creatology, which I believe is exclusive to them. They have smaller kits that are less expensive, but this large kit retails for about $20 - so coupons or sales are the way to go on this one.

One thing I loved about the kit is that no glue is required. This made it less messy and more convenient. The main structure of the house has tabs on the ends that fit into each other and the decorations are mainly stickers.
It doesn't really come with instructions. It shows a few photos on the back and you figure it out from there. This particular kit had over 100 pieces, but most of that is the decorations.
As for putting the main structure together I had to take my time and think a little bit about what I was doing. I didn't really have much trouble, but on my first try I did put 2 side pieces for the front part of the house in upside down. I figured this out when they seemed to be sticking out below the bottom of the front piece so I pulled them apart and adjusted them. So, it was good to know those types of mistakes are easy to fix.
I ended up following the box picture pretty much exactly for placement of all my foam pieces, but then went back and added more sparkly bricks than I saw in the photo. I had plenty of them. Although, it is totally possible to completely change it up and make it look different. The tree and tombstones lock into place in the base, but things like the ghosts, pumpkins, spiders, bats, etc are all stickers and could be placed anywhere you like. My daughter had fun helping me punch out the pieces on the stickers and placing some of them on. The only thing to be warned about this is since the house is just foam it does have a lot of give if pressed too hard it will pop out of place, so kids who are particularly rough and tumble may not be good helpers with this project.
I am skeptical about how well this will store. I think I need to keep it in a box because it will get dusty, especially since some of the stickers hang off the edges of things and have exposed adhesive on the back.
Overall I really enjoyed it and I think I'll try more of their foam kits in the future! Just be warned they don't really come with much instruction so you need to stop and think about it and it did take me a couple of hours to do, but there are lots of smaller kits that could easily be done in less time.
Happy fall!
Tracy, thanks so much for having me :)
Pin It
I display holiday decorations on my dining room table. You can see it when you walk into my house and it is easy to display things here. This year I purchased 2 sparkly candelabras from the Target $1 spot that are at the back of the table (and barely show in the photo.) I have a cute cat decoration. The pumpkin decorations are candle holders made to look like paper bags decorated as pumpkins. They are really fun lit up at night and very easy to store.
I embellished 3 wine bottles to fit the Halloween theme. Here is a close up shot of what they look like.

The main focus in the foam haunted house! I purchased it at Michaels recently. The brand is Creatology, which I believe is exclusive to them. They have smaller kits that are less expensive, but this large kit retails for about $20 - so coupons or sales are the way to go on this one.

One thing I loved about the kit is that no glue is required. This made it less messy and more convenient. The main structure of the house has tabs on the ends that fit into each other and the decorations are mainly stickers.
It doesn't really come with instructions. It shows a few photos on the back and you figure it out from there. This particular kit had over 100 pieces, but most of that is the decorations.
As for putting the main structure together I had to take my time and think a little bit about what I was doing. I didn't really have much trouble, but on my first try I did put 2 side pieces for the front part of the house in upside down. I figured this out when they seemed to be sticking out below the bottom of the front piece so I pulled them apart and adjusted them. So, it was good to know those types of mistakes are easy to fix.
I ended up following the box picture pretty much exactly for placement of all my foam pieces, but then went back and added more sparkly bricks than I saw in the photo. I had plenty of them. Although, it is totally possible to completely change it up and make it look different. The tree and tombstones lock into place in the base, but things like the ghosts, pumpkins, spiders, bats, etc are all stickers and could be placed anywhere you like. My daughter had fun helping me punch out the pieces on the stickers and placing some of them on. The only thing to be warned about this is since the house is just foam it does have a lot of give if pressed too hard it will pop out of place, so kids who are particularly rough and tumble may not be good helpers with this project.
I am skeptical about how well this will store. I think I need to keep it in a box because it will get dusty, especially since some of the stickers hang off the edges of things and have exposed adhesive on the back.
Overall I really enjoyed it and I think I'll try more of their foam kits in the future! Just be warned they don't really come with much instruction so you need to stop and think about it and it did take me a couple of hours to do, but there are lots of smaller kits that could easily be done in less time.
Happy fall!
Tracy, thanks so much for having me :)
Wednesday, October 19, 2011
Guest Blogger {Young and Crafty}
What an awesome pleasure to have Ms. Hannah from Young and Crafty here today.
Hannah introduced me to linking parties and spotlighting projects. I'm super honored to have her over here to show you this fab project!!
Thanks Hannah!!
xxxxxxxxxxxxxxxx
I'm so excited to be guest posting at Craft Junkie Too! My name is Hannah and I blog over at Young and Crafty. I'd love for you to stop by sometime :)
Here is what we will be making today:

A spooky spider wreath!

Here are the supplies you will need:
- A small wreath form (or big if you want!)
- Spiders (these are rings)
- Ribbon

Spray paint your wreath black. I also sprayed a few spiders (about 10) because I didn’t think I would have enough. They came in handy but I didn’t really need anymore than that. The spiders were rings so I had to cut the ring part off of all of them. Then hot glue the spiders everywhere. This is a GREAT TV project!

And there you have it… a spooky spider wreath!

I just love all of the legs going every which direction!

I used straight pins and hung it from my curtain in the kitchen. You can check out my BOO blocks HERE. And yes, I have needed to pot the plant on the right for about, oh, 3 months.
It’s on the to do list thank.you.very.much.
It’s on the to do list thank.you.very.much.

Tuesday, October 18, 2011
Guest Blogger {Scissors & Spatulas)
I'm so excited to have Jen from Scissors & Spatulas here today with a fabulous project. I've been admiring Jen's creative style for quite some time and feel truly honored to have her here today!!!
xxxxxxxxxxxxxxxxx
Hey y'all! I'm Jen, from Scissors & Spatulas. I'm excited to be a guest here at Craft Junkie Too today! Before I get started, let me tell you a little about myself and my blog.
xxxxxxxxxxxxxxxxx
Hey y'all! I'm Jen, from Scissors & Spatulas. I'm excited to be a guest here at Craft Junkie Too today! Before I get started, let me tell you a little about myself and my blog.

Today I'm going to share with you my "Wicked Witch Pumpkin."

If you've ever been by my blog, you know that I make weekly trips to the crafts stores to pick up some items to get my creative fix. Sometimes (often times) it's more than once a week. Anyway, I was at Michael's one morning and came home with these.

Two black pumpkins and some wired ribbon. What did I have in mind to do with these? I hadn't the faintest idea, I just knew I "needed" them. Once I got them home and started pondering, I decided that I wanted to decorate the pumpkin with a witch silhouette.

I stopped by Pinterest to see if I could find any ideas there. Of couse I did! I decided to add "wicked" to my witch pumpkin. This is the image I created with my Silhouette SD.

If you don't have one of these machines, you gotta get one! It's fabulous! The possibilities with it are endless!

I cut the design out on outdoor vinyl. Black was the only color I had on hand which obviously wasn't going to show up on a black pumpkin. What did I do?

I spray painted the vinyl orange before sticking it on the pumpkin! But I wasn't quite finished.

I added the ribbon to the top along with a candy corn pick that I had on hand.
Perfect! I decided one black pumpkin was enough for my front porch. I'm still trying to decide what to do with the other one I bought.

Thanks so much to Tracy for having me today! I hope you'll stop by my blog, Scissors & Spatulas, to see what other creative endeavors I've been up to!
xxxxxxxxxxxxxx
Thanks Jen for being here today! Your project is adorable…and your style is fabulous!!
Tracy
Thursday, October 13, 2011
Guest Blogger {A Creative Princess}
I'm so excited to have Terri from A Creative Princess here today to share an awesome tutorial. I've been a big fan of Terri's blog (she has some darling ideas) and I know you will become a fan too…
---------------------

Hi! I'm Terri and I have a little craft blog called A Creative Princess where I share my crafting obsession with all of you. I host "It's a Party" on Thursday's where everyone can show off their fabulous creations.
I am so happy to be guest posting here today! Thank you, Tracy!!
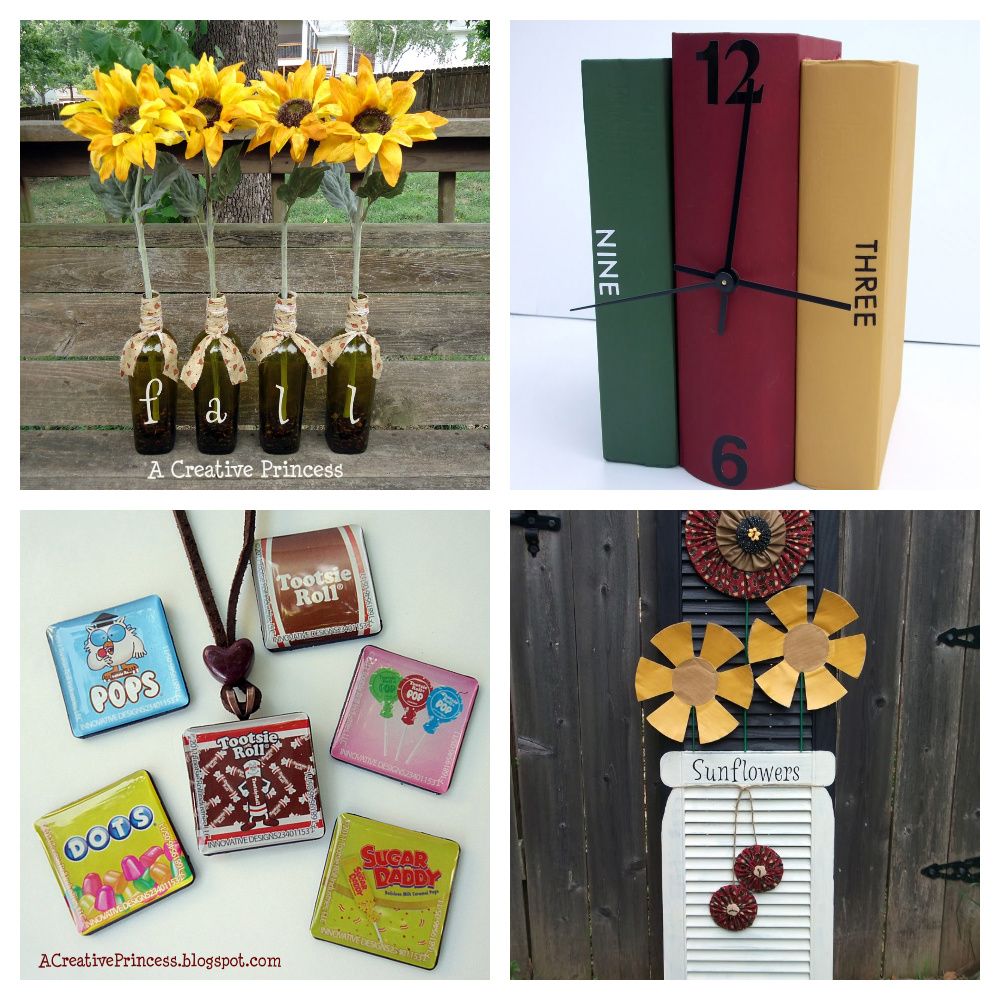
Today I'm going to share with you how I made this Fall Screen.

I had originally put it outside on my house, but it somehow ended up above my daughter's fireplace at her house!

I caught my husband one day throwing away an old screen (shame on him!). I grabbed it out of his hands and taped off a pumpkin shape on it.

Wow, that looks really bright there! Anyway, I spray painted it with orange. I didn't bother doing anything with the frame because it would be covered.

I wired long garland around the outside on the frame.

You might notice, I didn't paint a stem. I used the ends of the 2 garlands for the stem.
Thank you again, Tracy, for having me! I hope you all will stop by A Creative Princess sometime and let's get our craft on!
Monday, October 10, 2011
Guest Blogger {J and M's Eye Candy}
Hi there CJToo Friends I hope you had a great week-end! I am super duper excited to have these 2 lovely ladies here to share today. J & M's Eye Candy Blog is definitely one of my favorite blogs and I'm so happy they are here today!!
~~~~~~~~~~~~~~~~~~
Hello Craft Junkie Too Lovelies!!

We are two Stay at Home Momma's.
Sister in Laws by chance, friends by choice.
Lovers of creating and crafting.
"J&M" stands for Jayden and Maggie, our two little ladies. They both inspire us everyday.

We started our blog in May of this year, as a place where we can collectively archive our projects and share it with others like you. We hope that you are taking the time and enjoying crafting, whether it's during nap time, after work, and/or late at night like we do.
We share just about everything on our blog;
from recipes, mom tips, fashion, home decor, and crafty ideas + tutorials.
We also host linky parties! Every Tuesday we host "Help a Momma Out" and every Sunday we host "Strut Your Stuff." We would love to hear about and see your creations, and get to know you better, so please feel free to stop by and say hello! Now B is going to share a little piece of Halloween Eye Candy that you can make yourself.
I am totally in love with those tutus that are EVERYWHERE! They are so simple and girlie. I have seen a few scrap tutus pop up here and there and I thought that a Halloween tutu would be just to die for! I had all these Halloween scrap pieces of fabric laying around, and once the holiday is over they will be no use to me, so it was time to use them up!

First I cut them into 3 X 24 strips. The length depends on the size of the girl. I measured from J's hip to above her knee, then doubled it.

I cut A LOT of strips.

Then I sewed two pieces together. I didn't want to see the wrong side of the fabric, but this step really isn't necessary. In fact I didn't sew all of them because I started running out of strips. The difference isn't that big of a deal. They both look good to me.

Now just tie them around an elastic just like the regular tutus.


Cut all the stringies, and strut the Halloween spirit.


Thanks so much to Tracy for having us on today!!
We appreciate it, and hope to see you all in our neck of the woods soon!
We are also offering 10% off to you lovely readers in our shoppe.
Please use code CJTOO10 to ensure you receive your discount.
Have a lovely day!
~~~~~~~~~~~~~~~
Thank you SO much Kristine & Britney for being here today!!! You girls ROCK!!!
Don't forget to visit their FAB shoppe and use your discount….woop! woop!
~Tracy
Pin It
Subscribe to:
Posts (Atom)