follow mefollow mefollow mefollow mefollow mefollow mefollow me

Saturday, October 29, 2011

Crafty Halloween Blog Hop ~ Fall Altered Cricut Boxes

Welcome to the Crafty Halloween Blog Hop featuring my wonderful CJToo Crafty Designers.
Today we are all featuring Halloween projects for your inspiration and enjoyment!  

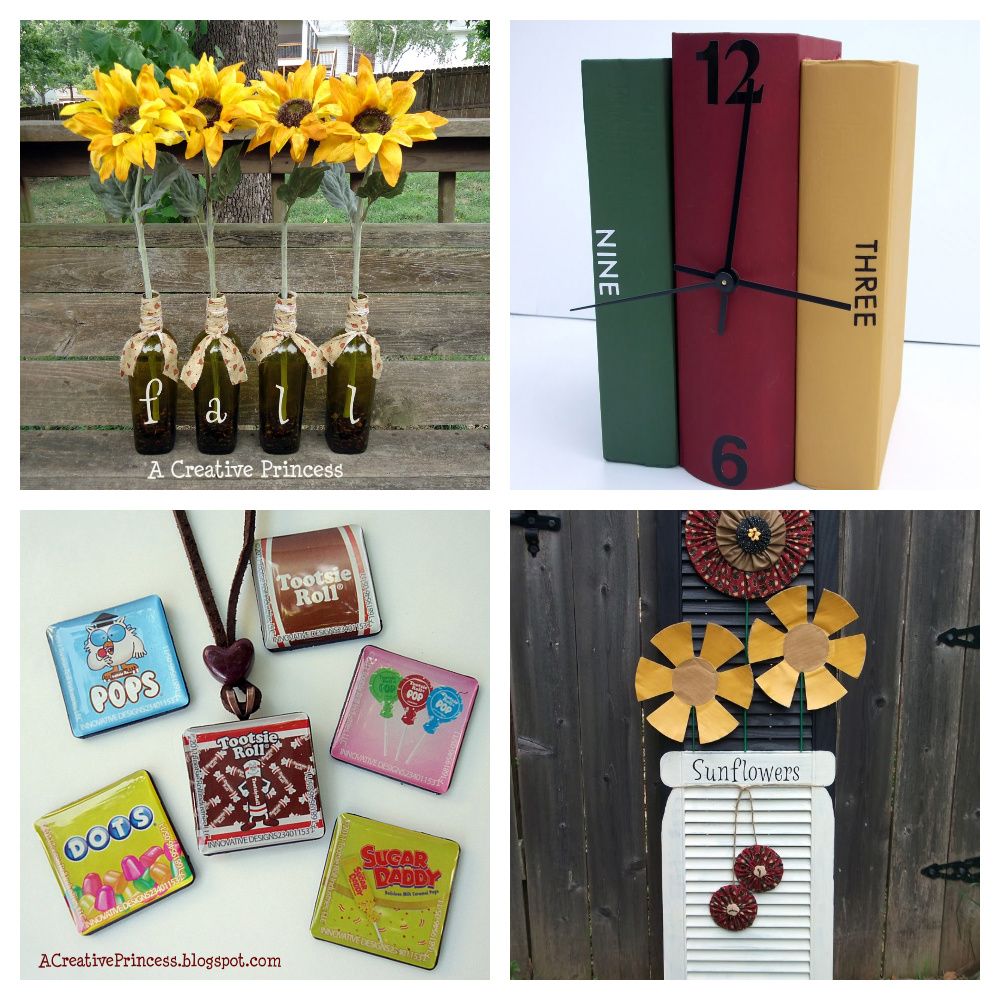
For my project I'm excited to show you a "trash-to-treasure", "repurposed", "recycled", "altered" FALL Home Decor blocks.

I used empty Cricut cartridge boxes as the basis of my project!


  • FALL letters - "Mickey Font" by Cricut cut at 5.50
  • brown lunch bags
  • patterned paper in fall theme
  • homespun fabric
  • picks and berries
  • raffia
  • wire


{PRIZE ALERT}
One My Pink Stamper stamp set of your choice from the 
My Pink Stamper Stamp line.
Click here for choices!


To enter to win:
blog visitors -- leave one comment here on this post…..(please leave an email in your comment so I can contact you if you win) 
email subscribers that don't leave comments email me your entry for a chance to win.  Trying to accommodate everyone for a fair chance! 

I'll draw a winner next week!  
Good Luck and thanks for hopping along with us!!

To continue with the hop -- click here to visit Cheryl's blog……
I can't wait to see what she's created for us today!!

Blog Hop Trail


Tracy @ Craft Junkie Too

Cheryl @ CardsbyCG 

Kadie @ Kards by Kadie

Kristy @ Craftin' on my Door

Roberta @ TX Scrapper Mom

Shawn @ Shawn's Fireside Crafting Room

Shelley @ Carley's Closet

Tanya @ Tanyaisis Creations
Pin It

Friday, October 28, 2011

Fall Craft Show Pictures….a look back!

I was looking through some old digital pictures of craft show crafts and thought it may be fun to share with you some of the pictures from one of my biggest shows I did in 2003 -- I would have forgotten the year but they are included on the photos so it was a great reminder.  Gosh, time flies.  I remember this show very well and sold out of most of my wood crafts.  Good times!  One day when Spencer is older I will get back into do more craft shows.  It's in my blood.

Thanks for letting me share…..


Pin It

Thursday, October 27, 2011

T.G.I.F. Linky Party #30

Welcome to this week's T.G.I.F. Linky Party ~  are you ready to show off your wonderful stuff??  We can't wait to see it!  


Don't forget to join us right here Saturday morning for the CJToo Crafty Designers Halloween Blog Hop -- I'll have some Halloween craftiness to share as well as a few give-aways!  I'm honored to be joined by all of my CJToo Crafty Designers along the hop…so hope you join us too!!.


Pin It

Wednesday, October 26, 2011

A little Halloween Blast from the Past with CJToo!!

Halloween has to be one of my FAVORITE holidays to craft for…..here are some of my most popular video's from YouTube thanks to YOU!

"BOO" to You Treat Bag - on YouTube
blog post here


Halloween Treat Bag - on YouTube
blog post here


Visit my YouTube channel for more Halloween videos by me….:)

Tracy
Pin It

Coming Soon ~ Crafty Halloween Blog Hop…this Saturday!!


Photobucket 

Join me and my CJToo Crafty Designers for a Crafty Halloween Blog Hop
Saturday October 29th

You'll see Halloween projects from the entire CJToo Crafty Designers Team and an opportunity to win some blog candy along the way.

Mark your calendars….and I'll see you all then!!

♥Tracy
Pin It

Tuesday, October 25, 2011

My Pink Designers Design Team Day Project - From Your Secret Santa Card

Welcome to the October edition of the My Pink Designers Design Team day hosted by Robyn, My Pink Stamper.  Today the team is creating cards using the Winter Treats & Sayings OR Biggie Christmas stamp sets SO if you are needing a little inspiration to kick of the 2011 holiday season you are in for a treat!

Several years ago, I hosted a Secret Santa gathering at work and it was so- much -fun.  There was about 16 of us so we were able to spread out the spirit.  If you don't know what a Secret Santa is an explanation from Wikipedia, the free encyclopedia:
Secret Santa is a Western Christmas tradition, in which members of a group or community are randomly assigned a person to whom they anonymously give a gift. Often practised in workplaces, or amongst large families, participation in it is usually voluntary. It offers a way for many people to give and receive a gift at low cost to those involved.
There are various traditions and ways in which a "Secret Santa" is run. In some variations, as Christmas approaches, names of participants are placed in a hat, and participants draw the name of a person for whom to buy a gift. Along with name submission, each participant may also submit a short wish-list of items from which the gift-giver can choose. There is often a limit to how much can be spent on the present. Presents are then sometimes exchanged anonymously. Many schools and offices do this at Christmas time, often as a cost-saving effort. It usually takes place prior to Christmas because the office and school settings require it. Sometimes people leave hints in cards on desks, others create other special ways to make themselves known. 
For ours….I developed a simple questionnaire that included random questions like favorite snack, candy, scent, holiday season event, collections, favorite places to go out to eat, shop, visit etc.  Then each person drew a questionnaire out of the bucket and that was their person to be the "Secret Santa" for.  Since I was the hostess.  We did set some limits because as you know with every thing you do there is always those who over spend or under spend, over give or don't give enough…..so we all agreed to giving something at least once a week until the week before Christmas then we'd send a little something each day, our Secret Santa's would be revealed at our annual Christmas party for the group.    It was so much fun!!  We really need to do that again……hmmmm….

Onto Today's project…...


Supplies:
Santa ~ Cricut Doodlecharms

Embossing folders ~ 
Swirls by Sixxix (santa's beard), Swiss Dots by Cuttlebug (brim of hat and ball of hat)
Plaid by Sixxix (Santa's hat (red part))

Santa's beard & eyebrows ~ yarn

Santa's nose ~ pink brad

red chalk for Santa's cheeks

border punch for green ~ Ribbon Loop by Martha Stewart

"From your Secret Santa" sentiment ~ Winter Treats & Sayings by My Pink Stamper


Pin It

Friday, October 21, 2011

Retirement Card using More Fabulous Phrases!!

Hi everyone and welcome!

Robyn, My Pink Stamper has done it again….she's added 8 new stamp sets to her design line and you add them to your collection as well.  With the holidays right around the corner you're going to be looking for something quick and easy to make as a gift and stamps are a great addition to your craft supply.  Click here to check out all 8 sets as well as some fabulous projects from the Pink Designers team.  She's also included a FABULOUS new opportunity when you purchase one of these new stamp sets -- visit her site to see what I'm talking about….

I'm excited to share my project with you for the release today.  It's from the newest stamp set called More Fabulous Phrases and what I like about this set is it's a little longer, going across the bottom or top of your card nicely as well as each stamp has the ability to bend (without breaking) like you see here in my photo.  You can visit Robyn's retailers here to find out where the stamps are being sold.

Thanks for stopping by and have a GREAT week-end everyone!!!


  • This is a long tall card, measuring 8 1/2 x 11 -- folded in half.  I rounded the corners with my corner rounder punch.  
  • Tree is from Cricut April Showers
  • I made the banner cutting out triangles using my pinking sheers scissors.  
  • Embossing folders - Seeing Spots by Cuttlebug (tree), Plaid by Sixxix (trunk)


Pin It

Thursday, October 20, 2011

T.G.I.F. Linky Party #29

Welcome to this week's T.G.I.F. Linky Party ~  I'm taking a little break from posting here at CJToo because of some family things (you can read about that here) but don't fret -- I still want you to share your awesome projects and tutorials……please link up below….and have fun!!


On a personal note -- THANK YOU….SO very much for your comments, emails, kind words, support, personal stories, and more that you've shared with me.  I wasn't sure how my post about my sweet boy would be intercepted and I couldn't have asked for better online friends.  If I didn't respond to you personally -- it's because your email address wasn't on the comment.  For some reason blogger has "no reply at blogger.com" for some email addresses.  I personally want to thank you all for your stories and loving support. 
  
 I love you all!!


Pin It

Guest Blogger {Staying Crafty}

I'm super excited to have my friend Amber here today from Staying Crafty to share some wonderful decorations.  Amber is so super talented and I just love her style!  Thanks for being here today Amber!!!

xxxxxxxxxxxxxxxx


Hello everyone!  This is Amber from Staying Crafty and I'm so excited to be sharing on Tracy's blog today.  

Today I've decided to share my Halloween decoration table with you.  As well as a sort of product review on a foam haunted house kit by Creatology that can be purchased at Michaels.

I display holiday decorations on my dining room table. You can see it when you walk into my house and it is easy to display things here.  This year I purchased 2 sparkly candelabras from the Target $1 spot that are at the back of the table (and barely show in the photo.)  I have a cute cat decoration.  The pumpkin decorations are candle holders made to look like paper bags decorated as pumpkins.  They are really fun lit up at night and very easy to store.

I embellished 3 wine bottles to fit the Halloween theme.  Here is a close up shot of what they look like.


The main focus in the foam haunted house!  I purchased it at Michaels recently.  The brand is Creatology, which I believe is exclusive to them.  They have smaller kits that are less expensive, but this large kit retails for about $20 - so coupons or sales are the way to go on this one.


One thing I loved about the kit is that no glue is required.  This made it less messy and more convenient.  The main structure of the house has tabs on the ends that fit into each other and the decorations are mainly stickers.

It doesn't really come with instructions.  It shows a few photos on the back and you figure it out from there.  This particular kit had over 100 pieces, but most of that is the decorations.

As for putting the main structure together I had to take my time and think a little bit about what I was doing.  I didn't really have much trouble, but on my first try I did put 2 side pieces for the front part of the house in upside down.  I figured this out when they seemed to be sticking out below the bottom of the front piece so I pulled them apart and adjusted them. So, it was good to know those types of mistakes are easy to fix.

I ended up following the box picture pretty much exactly for placement of all my foam pieces, but then went back and added more sparkly bricks than I saw in the photo.  I had plenty of them.  Although, it is totally possible to completely change it up and make it look different.  The tree and tombstones lock into place in the base, but things like the ghosts, pumpkins, spiders, bats, etc are all stickers and could be placed anywhere you like.  My daughter had fun helping me punch out the pieces on the stickers and placing some of them on. The only thing to be warned about this is since the house is just foam it does have a lot of give if pressed too hard it will pop out of place, so kids who are particularly rough and tumble may not be good helpers with this project.

I am skeptical about how well this will store.  I think I need to keep it in a box because it will get dusty, especially since some of the stickers hang off the edges of things and have exposed adhesive on the back.

Overall I really enjoyed it and I think I'll try more of their foam kits in the future!  Just be warned they don't really come with much  instruction so you need to stop and think about it and it did take me a couple of hours to do, but there are lots of smaller kits that could easily be done in less time.

Happy fall!

Tracy, thanks so much for having me :)

Pin It

Wednesday, October 19, 2011

Guest Blogger {Young and Crafty}

What an awesome pleasure to have Ms. Hannah from Young and Crafty here today.  
Hannah introduced me to linking parties and spotlighting projects.  I'm super  honored to have her over here to show you this fab project!!  
Thanks Hannah!!


xxxxxxxxxxxxxxxx


I'm so excited to be guest posting at Craft Junkie Too! My name is Hannah and I blog over at Young and Crafty. I'd love for you to stop by sometime :)


Here is what we will be making today:

DSC02296

A spooky spider wreath!

DSC02290

Here are the supplies you will need:
  • A small wreath form (or big if you want!)
  • Spiders (these are rings)
  • Ribbon
DSC02291

Spray paint your wreath black. I also sprayed a few spiders (about 10) because I didn’t think I would have enough. They came in handy but I didn’t really need anymore than that. The spiders were rings so I had to cut the ring part off of all of them. Then hot glue the spiders everywhere. This is a GREAT TV project!

DSC02300

And there you have it… a spooky spider wreath!

DSC02302

I just love all of the legs going every which direction!

DSC02301

I used straight pins and hung it from my curtain in the kitchen. You can check out my BOO blocks HERE. And yes, I have needed to pot the plant on the right for about, oh, 3 months. 


It’s on the to do list thank.you.very.much.

SD-SilverDamask-3-1
Pin It

Tuesday, October 18, 2011

Guest Blogger {Scissors & Spatulas)

I'm so excited to have Jen from Scissors & Spatulas here today with a fabulous project.  I've been admiring Jen's creative style for quite some time and feel truly honored to have her here today!!!

xxxxxxxxxxxxxxxxx

Hey y'all! I'm Jen, from Scissors & Spatulas. I'm excited to be a guest here at Craft Junkie Too today! Before I get started, let me tell you a little about myself and my blog.


I'm a wife to an amazingly patient man and a mommy to two little boys (Jackson, 3 & Parker, 2) and three fur babies (Lily, Sophie & Lucy). As you can imagine, that there is never a dull moment in my house, but I wouldn't have it any other way! I constantly have my hands in something, whether it's cooking, decorating, DIY projects or crafting. To keep my sanity amongst all the chaos, I share my love for these things on my blog. You never know what you're going to get when you stop by Scissors & Spatulas! 


Today I'm going to share with you my "Wicked Witch Pumpkin."


If you've ever been by my blog, you know that I make weekly trips to the crafts stores to pick up some items to get my creative fix. Sometimes (often times) it's more than once a week. Anyway, I was at Michael's one morning and came home with these.


Two black pumpkins and some wired ribbon. What did I have in mind to do with these? I hadn't the faintest idea, I just knew I "needed" them. Once I got them home and started pondering, I decided that I wanted to decorate the pumpkin with a witch silhouette. 


I stopped by Pinterest to see if I could find any ideas there. Of couse I did! I decided to add "wicked" to my witch pumpkin. This is the image I created with my Silhouette SD.


If you don't have one of these machines, you gotta get one! It's fabulous! The possibilities with it are endless!


I cut the design out on outdoor vinyl. Black was the only color I had on hand which obviously wasn't going to show up on a black pumpkin. What did I do?


I spray painted the vinyl orange before sticking it on the pumpkin! But I wasn't quite finished. 


I added the ribbon to the top along with a candy corn pick that I had on hand.


Perfect! I decided one black pumpkin was enough for my front porch. I'm still trying to decide what to do with the other one I bought. 


Thanks so much to Tracy for having me today! I hope you'll stop by my blog, Scissors & Spatulas, to see what other creative endeavors I've been up to! 


xxxxxxxxxxxxxx


Thanks Jen for being here today!  Your project is adorable…and your style is fabulous!! 


Tracy
Pin It

Sunday, October 16, 2011

ADHD Awareness Week :: For this Child I Prayed!


This is Spencer -- my sweet boy, my crafting buddy and my very strong-willed child!  

I have a plaque above his bed that reads "For this Child I Prayed!"  I found this plaque a little over a year ago and at the time of hanging it in his room we were desperate for answers.  What is going on with this child??  When will he grow up, mature and act right??? Where is the line drawn in the sand when your rambunctious, intelligent, fearless, rowdy boy goes from "just being all boy" or "strong-willed" to…questioning….is there something else going on with him?  He was unable to sit still.  At home, at school, in church, at the dinner table, watching tv -- everywhere.  More than that he was very impulsive.  Aggressive impulsive.   At school something would "rock his world" and he would not be very nice to his friends, hitting, kicking, pushing or tackling was all in a days work.  I had many parent-teacher conferences, cried, prayed for guidance, pleading for wisdom to help this child that is a gift but so very difficult to raise.  My husband and I were at our wits end.  We tried every discipline tactic….but to no avail -- nothing got through to him.  


Pin It

Friday, October 14, 2011

Pink-alicious Blog Hop ~ October

Welcome to the October Pink-alicious Blog Hop hosted by Robyn at My Pink Stamper. If you're following the blog hop trail you should have arrived from Sharon's blog….click here to start at the beginning so you won't miss anything. 


 For this blog hop we were to create a goodie or treat bag and showcase one of the stamp sets that is all about yummy-ness! So fun! I've created a goodie bag that can be shared with any and everyone. Just a simple message to say "You are the cherry on top" is the best way to say thanks, congrats, well done, go for it, maybe next time, and much more.


Project Supplies:
1.  "Cherry" - Smiley Cards by Cricut
2.  Clear Cello Bags
3.  Celebrate It Kraft bags
4.  My Pink Stamper's "Sweet Goodness" stamp set.
5.  Red, white checkerboard elastic ribbon (Hobby Lobby)
6.  Threading Water border punch by Fiskars
7.  "Vintage Photo" ink by Ranger for inking around edges.
8.  "Ribbon Loop" corner punch by Martha Stewart.
9.  Twine by Papertrey Ink


Thanks for stopping by and head over to Andrea's blog next….


Blog Hop Trail 

 Tracy (CraftJunkieToo) (<---you're here)
 June 

Pin It

Thursday, October 13, 2011

T.G.I.F. Linky Party #28

Welcome to this week's T.G.I.F. Linky Party ~  I'm taking a little break from posting here at CJToo because of some family things (you can read about that here) but don't fret -- I still want you to share your awesome projects and tutorials……please link up below….and have fun!!

On a personal note -- things are getting better for my little guy -- we're balancing our life with an ADHD 5 year old and helping him be successful.  He is a true joy and eating up the extra NEEDED attention!!  Thank you ALL for your support, personal messages and prayers.  I love you all!!


Pin It

Guest Blogger {A Creative Princess}

I'm so excited to have Terri from A Creative Princess here today to share an awesome tutorial.  I've been a big fan of Terri's blog (she has some darling ideas) and I know you will become a fan too…

---------------------


Hi! I'm Terri and I have a little craft blog called A Creative Princess where I share my crafting obsession with all of you. I host "It's a Party" on Thursday's where everyone can show off their fabulous creations.
I am so happy to be guest posting here today! Thank you, Tracy!!

Today I'm going to share with you how I made this Fall Screen.

I had originally put it outside on my house, but it somehow ended up above my daughter's fireplace at her house!

I caught my husband one day throwing away an old screen (shame on him!). I grabbed it out of his hands and taped off a pumpkin shape on it.


Wow, that looks really bright there! Anyway, I spray painted it with orange. I didn't bother doing anything with the frame because it would be covered.


I wired long garland around the outside on the frame.


You might notice, I didn't paint a stem. I used the ends of the 2 garlands for the stem.
Thank you again, Tracy, for having me! I hope you all will stop by A Creative Princess sometime and let's get our craft on!

Pin It

Wednesday, October 12, 2011

CJToo Crafty Designers Design Team Day!


Fall or Halloween Project : Goody Bags


 What a wonderful and talented group of ladies I have on my Design Team!! 
The Design Team assignment this week is

Fall or Halloween Project : Goody Bags
The idea is to create a goody bag that can easily be mass-produced for a classroom full of kids, daycare, bible school etc.


To see more about their fabulous creations - you can visit their blogs by clicking on their names or on the photo of their project. Let's get the creativity rolling shall we??

~~~~~~

Kadie at Kards by Kadie created these FANTASTIC Halloween bookmarks for her grand kids. I love all the little images in her "Happy Halloween" sentiment.


~~~~~~

Cheryl at CardsbyCG.blogspot.com created these wonderful spider treats... hop over to her blog to find out what creative supplies she used.


~~~~~~

Kristy  at Craftin-on-my-Door gave us this wonderful pic of her project. I can't wait to run over there and see the rest of her stinkin' cute treats!


~~~~~~


Tanya over at Tanyaisis Creations made a wonderful table full of Halloween goodies! Hop over to her blog to see more.


~~~~~~
Shelley at Carleys-Closet shares these wonderful treat boxes. So cute right?!?


~~~~~~


Roberta  at TX Scrapper Mom made these terrific 
party popper style treats.  I just love the paper she's used.


~~~~~~
I hope you enjoy these wonderful projects. Please head over to give my wonderful designers some comment LOVE! I know they appreciate it as much as I do.
Pin It