Hi everyone -- I'm excited to be sharing my very first project with you as a Tutorial Designer for Digital Delights by Louby Loo. Click HERE to see my post.
I was super excited when my sweet friend Kassidy invited me to join her for her Birthday Week going on at her blog ~ Inking It Up Crazy. It's a week filled with ideas to share any and everything surrounding a birthday. Click here to see Monday & Tuesday's post as well as check back for later in the week for some more fabulous ideas. YAY! I was even more excited to see that my assignment included creating some party favors for today's post. You all know how much I LOVE creating party favors. :)))
My birthday party favors begin with some paper horns (yes, the ones you blow and that can make lots of noise). I filled them with candy, inserted into a plastic baggie, tied some curly ribbon around the top, added a cute birthday tag, used the cupcake stamp and "Celebrate Today" stamp by My Pink Stamper, Simply Sweet Occasions (click here to see more), and waa laaa....perfect and quick birthday party favors for your next party.
Here is a video to show you how I created them. :)
Kassidy has an array of fabulous designers lined up to create some outstanding crafty projects for you this week as well as some awesome blog candy. Click here to check it out.
Thanks Kassidy for the invite to create with you. I had a blast with these. :)
Hello everyone! I had some MAJOR issues with YouTube and tried several times to get this second part of my Imagine Nation project uploaded ~ so sorry for the delay this evening. This video will show you the purse assembly from my project today for Imagine Nation Monday at My Creative Time's blog. :) To read all about Imagine Nation Monday and see my Video #128 (Cricut Imagine project tuturial) Click {HERE}
I am so super excited to show you my very first Imagine project today and to put the cherry on top my wonderful friend Emma asked me to be her guest designer today for Imagine-Nation Monday. I am totally thrilled. What an honor. Thank you Emma!
Click {HERE} to view my guest designer's post and also Emma's totally fabulous polka dot cupcake project and link up YOUR Imagine project for a chance to win a prize. :)
Emma told me to make a project with polka dots and I quickly got to work. woot! woot! I was a happy girl! I absolutely love polka dots too and create a lot of projects with this design so I was sooo happy! :)
For my project today I created this Polka Dotted Party Purse using my Best Friends Imagine cartridge and my Cricut Imagine machine.
Polka dotted Party Purse -
Best Friends Imagine cartridge
2 sheets of 12x12 white cardstock
- select "fit to page" for polka dotted pattern - page 29 (outside of purse)
- select "flip" and "fit to page" button cutting purse in pattern on page 44 (liner of purse)
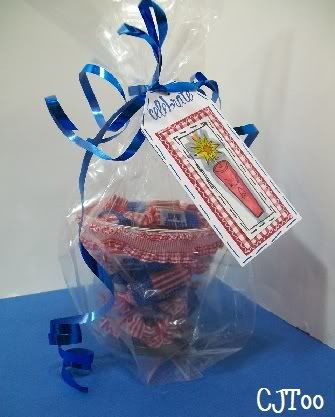
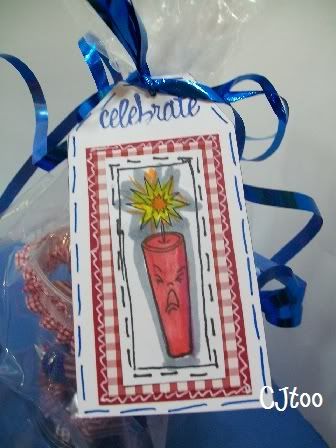
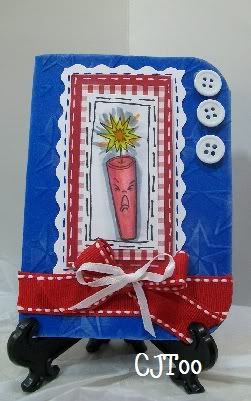
Here is some cute 4th of July treats I put together for some of my friends in the offfice. You could do this quick treat for family get togethers, kids, grand kids or neighbors too.
I love to use plastic punch cups as the base of treat cups/goodies...and you can "dress" them up for every occassion. I found the red, white and blue tootsie roll pops at Dollar Tree.
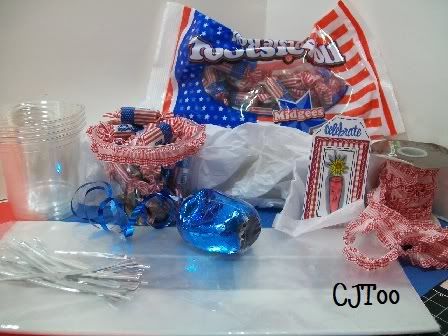
Here are the supplies I used for the treats.....
Plastic punch cups - Grocery store or Wal-Mart
Tootsie Roll Pops - Dollar Tree
Clear goodie bags - party section of the grocery store or Wal-Mart
blue curly ribbon
red and white checkered ribbon - Hobby Lobby (attaches and holds best with red sticky tape around edge of cup)
You can fill treat cup with any treat you'd like but be aware of chocolate (which tootsie rolls are) and the heat if you are going to be outside during the upcoming holiday. Ü
I ran across these clear boxes in the wedding section of Wal-Mart and thought they would a great holder for candy treats for my MIL's birthday party. They are holders for all kind of small treats including candies, mints, and small trinkets. I decided to fill them with assorted chocolate candy and tied tulle ribbon around the entire box. The scalloped circle is a 1 1/2 punch by Marvy and the adorable Happy Happy Birthday stamp is from My Pink Stamper's Everyday Occassions stamp set. It fits perfect on the scalloped circle. The mini hearts stamp is from from My Pink Stamper's Simply Sweet Occassions stamp set. Both sets are a must have for your stamp collection. I will be doing more projects with these stamps soon. I have lots of ideas for using them on my projects so stay tuned for that. You can purchase either stamp set at http://www.customcrops.com/ but you will definitely want both. Ü
Thanks for looking everyone and for your comments. Click below the "more projects" pictures below to leave a comment.
Staying with Spencers Big Green Tractor theme this year I made individual goodies bags for each child in his pre-school class. 15 in all (thanks goodness) LOL. Using the tractor from Everyday Paper Dolls - cut at 3 inches. The wheels I drew circles out of black cardstock and cut around the edges with decorative edge scissors that the edges a rough look; ran the wheels through my Cuttlebug using the bubbles cuttlebug folder. The yellow hearts are punches; this gave each tractor the yellow that's inside the JDeere tractor wheels. I personalized each tractor tag/bag with the childs name. The paper is red/white checkered scrapbook paper trimmed to the size of the bag. Another decorative edge scissor with a jagged affect trimmed off the edges.
I had a lot of fun working with the little guy this year on valentine treats and stuff but whew - glad it's almost time to move onto something else. LOL.
Sorry the lighting isn't the best - I quickly took this picture as we were heading out the door on our way to school. Ü Didn't want to forget to show my CJToo friends!
It's amazing what we can find to reuse, recycle and turn into a sweet Valentine project. The inspiration was the paper towel holder and I thought it would make a wonderful filler/tube for candy.....the rest of the idea's followed. I used a candy mold paper liner for the bottom so my candy wouldn't fall out. I then attached valentine paper around the tube and secured with my ATG (Adhesive Tape Gun). This provides a very strong bond and hold. I pulled out my Doodletype Cricut cartridge.....cutting the heart at 3 inches and the burst at 3 inches also. I filled the tube with Starburst candy and finished the project off with curly ribbon and tulle. Tulle really provides an extra touch to my projects. I really like using it. It comes in a roll and an array of colors. Let me know what you think....I appreciate your comments -ÜÜÜ I will post a picture later this evening....Ü
Happy Saturday everyone....Here are the valentine treat projects I promised you I would post. I put together a video consisting of what paper and other goodies I used and also a slide show of pictures of the finished projects. Below I will give you more details and instructions. Contact me if you have additional questions....
Leave me a comment below this post and let me know what you think.
In this first project I used the large candy bars (Hershey's, Mr. Goodbar and Kit Kat) - you can get these for around $1.00 in most places.
For this candy bar I wrapped pattern paper around the bar securing with scotch tape in the back. I decorated the top with tulle and black curly ribbin. The scalloped circle is 3 inches. The heart is just cut from patterned paper. The sentiment is a stamp from The Paper Studio stamped in black ink as well as black inking around the torn edges. I used a pop dot to add deminsion.
This candy bar is wrapped in another valentine pattern paper with the same concept of securing with tape. I personalized the tag myself with a sharpie marker. The black hearts are the Folk Heart punch by The Paper Studio (found at Hobby Lobby) and I added a white brad to each heart. Also used pop dots to add deminsion.
This candy bar is decorated with a black and white theme. I used polka dot ribbon, white sheer dot and black thin ribbon for the bow. The tag is also a punch by Marvy but you can use any tag and/or your cricut to cut out numerous tags. I just doodled the name and attached with more ribbon.
Simple and cute.
~~~~~~~~~~~~~~~~~~~~~~~ Treat Buckets
You can find these cute metal buckets about anywhere; Wal-Mart, Target, the craft stores....etc. just ready for you to fill with candy, treats, toys, trinkets and more. If you haven't visited the valentine aisle yet in the stores you need to because Valentines' Day is not just about candy and stuffed animals....there is a huge variety of doo dads to fill your baskets and/or buckets with.
This is a red metal bucket I found at Wal-mart, I threaded white glittery ribbon through the holes (which are in the shape of a heart) and tied a simple knot in the front. I filled the bucket with candy, treats, pencils, trinkets and this and that. Add a tag or leave it like this.
~~~~~~~~~~~~~~~~~~~~~~~~~~~~~
Treat Bags
Treat bags are so easy to make. There are so many cute bags that you can fill with candy or various treats and secure with twist tie or ribbon. The tag is cut at 4" from Sweethearts Cricut cartridge. Regular and shadow. Add inking and some doodling or a sentinment and you're done. So cute!
~~~~~~~~~~~~~~~~~~~~~~~~~~~~~~ Plastic Cup Treats
Definitely my favorite this year.....I found the clear plastic cups (punch cups) in the paper ware aisle of my grocery store.
Decorate, stuff and add treats. I used a valentine themed napkin inside the cup and stuffed in goodies. The HUGS AND KISSES is cut at 3 1/2 inches from Sweethearts Cricut cartridge, regular and shadow. The sweethearts cartridge is a definite must have for valentines and I know most of my recent projects show this primary cartridge. Ü I attached the HUGS AND KISSES to red cardstock and cut around the edges with decorative scissors. To assemble the cup...add the card first, then stuff your goodies. It's easier. The tag is a Marvy punch and the pink folk heart is the Folk Heart punch by The Paper Studio. Ink around the edges, doodle with a black sharpie and call it a job done.
This tag is from Sweethearts cricut cartridge - cut at 3 1/2 inches (regular and shadow) - texture added using my Cuttlebug and Distressed Stripes folder. White heart brad added in the center. The tag is the Marvy tag punch, swiss dots cuttlebug folder and pink inking around the edges. Various white, pink, and red ribbons added the finishing touches.
~~~~~~~~~~~~~~~~~~~~~~~~~~~~~~~~
Okay everyone....there you have them. I have a few more ideas but I know it's getting really close to Valentine's Day so I may save those ideas for next year.
Thanks for your comments and for your feedback. I really appreciate you visiting, commenting on my posts (below) and following my blog.
I have a special treat for you, CJToo friends....I had my best buddy Spencer help me with this project. He is so sweet and a lot of fun! He is always wanting to "craft" with me so I took the time to let him help me with this project. He is so proud of it and we had a great time putting this together for you.
For this project we selected the scalloped heart from the Sweethearts Cricut Cartridge.....this is a new cartridge and if you don't have it yet.....click HERE to leave comment on the post and enter for a chance to win a Sweethearts cartridge for yourself. Please note.....you need to enter before Friday January 22, 2010 as that is when I will draw the winner using random number generator. Good Luck!
Thanks so much for your comments everyone....reading your comments really is what keeps me hyped and excited for the next project.
The TBBM (Tags, Bags, Boxes and More) Cricut cartridge is one of my favorites for making cute boxes and bags so that I can create, decorate and fill with a sweet treat. In this video I create the heart box on page 121 and show you how you can create one too. Decorate the box with ribbon, stickers, markers, paint, cricut shapes, other shapes, or just leave plain. Then fill with candy, a candle, other gift or a sweet note. The person you are giving it to will be so happy.
Here is one of the Treats I told you about ~ this is my Treasure Treat Purse using cardstock, scoring, a tiny flower, brad of your choice and ribbon. Super simple to do, I promise. Ü
Here is the video so let me show you how super simple it is to do this one.....
Here is a simple, cute and wonderful little treat idea that makes a huge impression on your friends.
I start with black cardstock, score it to fold at the bottom, inside is a Reese's peanut butter cup - but you can include whatever you'd like, add a cute stamp, some curly ribbon and you've got yourself another cute halloween treat.
Here is Video #44 that will give you all of the details if you're interested.
I have so many ideas for you this year for goodie bags, treats, holders and cute little gift ideas that would be perfect for the kiddo's for halloween, kids classes, sunday school classes, co-workers, nieces, nephews and adults alike.
In this video I will go through the ideas I have and show you a snipett of what you can expect in the video tutorial. I will post the individuals video tutorials soon so if you are interested in seeing the details please check back or better yet sign up for my newsletter -----> and those individual tutorials will come right to your inbox. Ü
Here is the line-up for the Halloween Treats CraftJunkieToo Style:
Hi everyone...thanks for stopping by CJT's blog and checking out this project. With school right around the corner - I thought it would be a fun project to make a simple treat bag using a teddy bear that could be adapted to fit anyone's classroom or fun event. What a wonderful way to say "It's "beary" nice to meet you" than with this fun little treat bag. Teddy Grahams are a wonderful treat to hide inside.
I start with a standard brown lunch bag and transform it into something "beary" sweet. Ü You can watch the video to check out how I put this little bag all together. I use Cricut Doodlecharms for the teddy bear and include my paper crimper and brown ink for the edges.
Creating birthday goodie treat bags are super simple. I start with plain brown lunch bags and transform them into treat bags that the kids will love. You can stamp, paint, draw, color or stencil images. The possibilities are endless. The theme for these goodie treat bags is cowboy, western or rustic but you can adapt this concept to create you own special bags.
In this video I will show you how I created these sweet bags. I hope this inspires you or gives you some additional ideas.
Leave me a comment and let me know what you thing.
xoxo,
Tracy
To add a little card - try business cards. They are hassle free, already preforated, easy to create using clip art and fonts from your computer, etc. There are tons of free clip art images out on the web - or use something already on your computer. How about adding your childs hand print or thumb print to the card. Just open up your ink pad, press and stamp. Simple as that.
I hope my project video's are helpful to you.
If so - please leave me a comment so I will know. ÜÜÜ