


I started with a board that was a chalkboard - it measures about 11 x17. All I needed to do was paint the rim black.
M and date ~ Storybook Cricut Font cartridge
Chelsea & Brent ~ Cursive 101 Cricut Font cartridge
white flowers are from a spool of ribbon - I just tied the teal ribbon in between for a gathered look.
Teal and black are the colors of the wedding.


To separate the letters on the M I used a very thin black sharpie maker to draw around the letter. I also did a little doodling on the M to tie it all together. Did you spot my "bling" on the M. I love it!
=============

Wedding Dress and Groom Tux ~ Sweehearts Cricut cartridge
For some of the layers I used glitter paper I get from Target like on the wedding dress, veil, and the grooms jacket (lapels part), I used black diamond stickles to make dots on cuffs and buttons on grooms jacket.
Border punch is from EK Success - Scroll & Dots

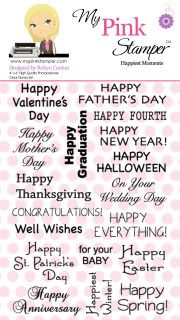
Sentiment is from Happiest Moments Stamp set by My Pink Stamper


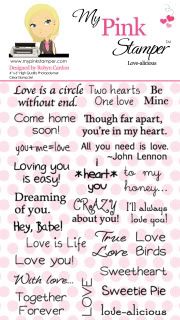
For the inside of the card I took a regular envelope, sealed the back (flap) and cut off a 1/4 of it to make an opening and give a "pocket" look and feel. I took my 1 1/2" circle punch and punched a 1/2 circle at the top of the opening so I could slip in a little "something something" for the bride and groom. To decorate the pocket I inked up the edges with some gray ink, doodled with my black marker and cut a piece of the same pattern paper to attach to the middle of the pocket. The "Love is a circle without an end" is from the My Pink Stamper stamp set "Love a licious". Click here to see more. stamp sets.
♥ Tracy
This project was featured here….:) Thanks Sarah!!!

=========

Christmas in July
Craft Show
July 13th - 27th
Purchase Craft Junkie Too crafts as well as Personalized by Tracy items all from the comfort of your own computer chair. More info coming!
========
Linking up at these fun Parties this week….
Made It Myself Mondays :: Dittle Dattle :: Making the World Cuter :: The Girl Creative :: Keeping it Simple :: Tip Junkie :: Hope Studios :: Tuesday Time Out :: Tuesday Linky Party :: CraftoManiac :: Make Something Monday :: Show Me What Ya Got :: Marvelous Monday :: Me Making Do :: Too Cute Tuesday :: Topsy Turvy Tuesday :: Sisters Stuff :: Hoo's Got Talent :: Somewhat Simple :: Fireflies & Jelly Beans :: Paisley Passions :: Simply Designing :: Simple Home Life :: Nap Time Crafters :: Sassy Sites ffa Party :: Free for All at Young & Crafty :: What are Little Boys Made of? :: It's a Hodgepodge Life :: Chic on a Shoestring Decorating :: Frugal Friday :: Feature Yourself Fridays :: Show and Tell Saturday :: The DIY Show Off
Pin It
